# Recording, Playback, Transferring Files
## Ready to Record
With your mics' gain levels and headphone volumes set, you are almost ready to start recording. There are a few settings in the menu you should verify before starting. ***If you change any of these, please return them to our standard at the end of you session:***
* To enter the menu, press the menu button, the use the up, down, and confirm buttons (also the tone, comp, and AI buttons) to navigate.
* Mic Settings > Low pass filter: **On** for all 4 mics
* Mic Settings > Limiter: **On** for all 4 mics
* System > Recorder Mode: **Multi Track**
* This setting records both an easy, ready to go, mixdown audio file of all your tracks together and records each microphone separately. This is always preferable, even just as a backup.
Worth noting: File Limits and Recording Settings
Its worth noting that all files are recorded in 24bit at 48khz. This is considered very good quality. This can not be changed, but you can adapt you recordings in post if needed.
If a file size exceeds 2 GB during recording, a new file will be created automatically and recording will continue without pause. No gap in sound will occur between the two files when this happens. These files will be in your session folder (see transferring files)
### Recording
* When you are ready to record. Press the Record button. The button will turn red to indicate it is recording.
* *Pressing the record button again will stop the recording*. This means it will finish writing the audio file and if you press record again a new file will be started.
* If you want to take a break, but don't want to have multiple files, you can use the the Play/Pause button to temporarily stop recording. Pressing it again will resume recording on the same file.
### Playback
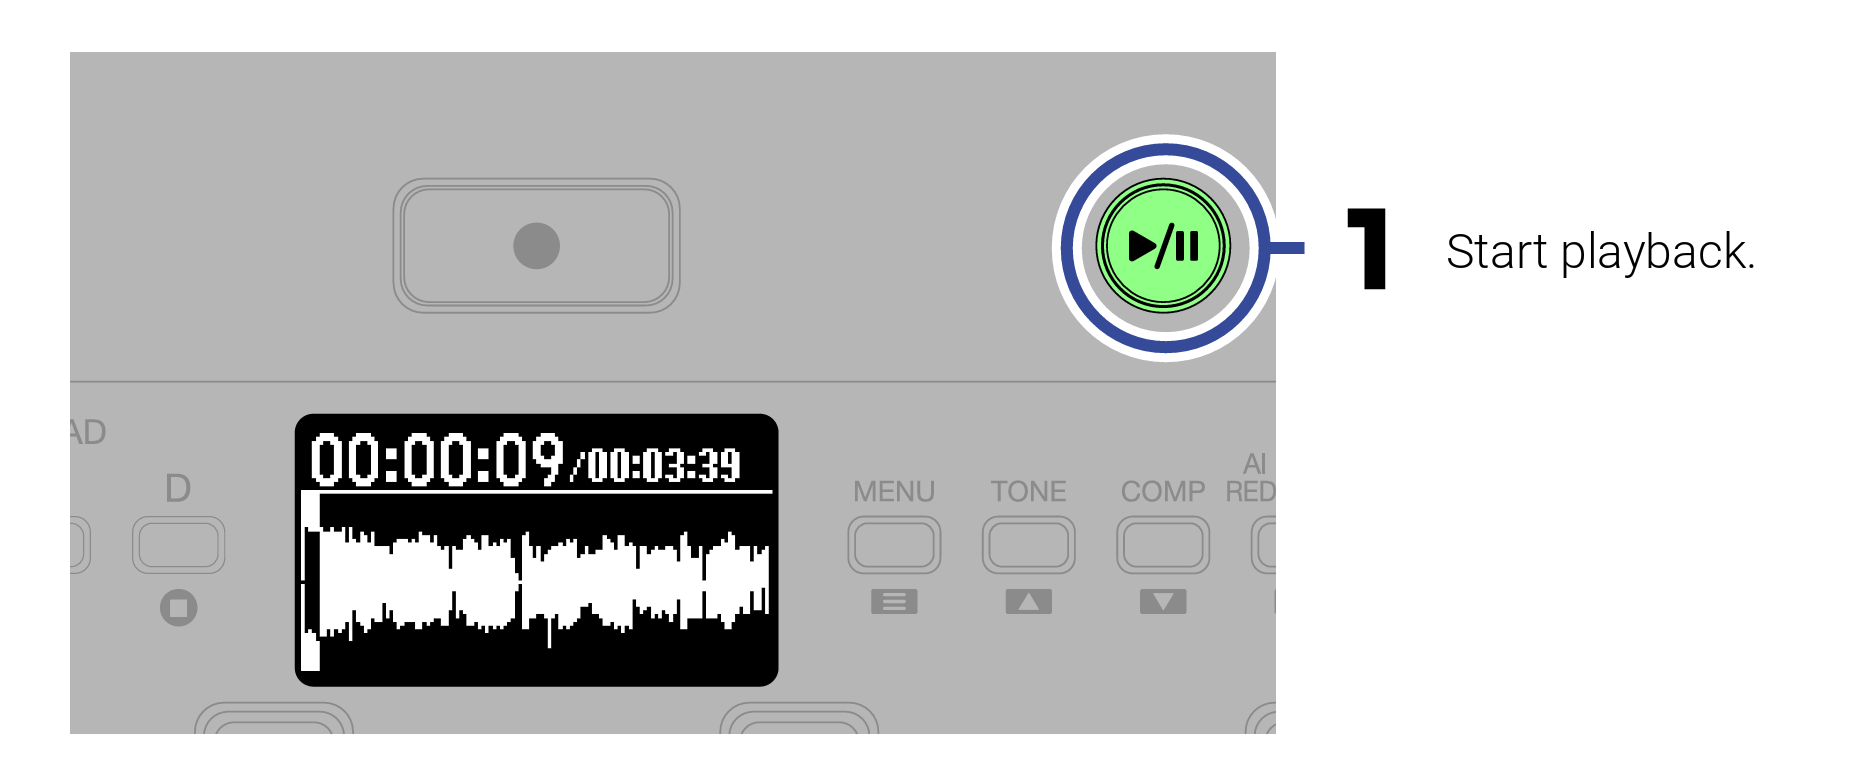
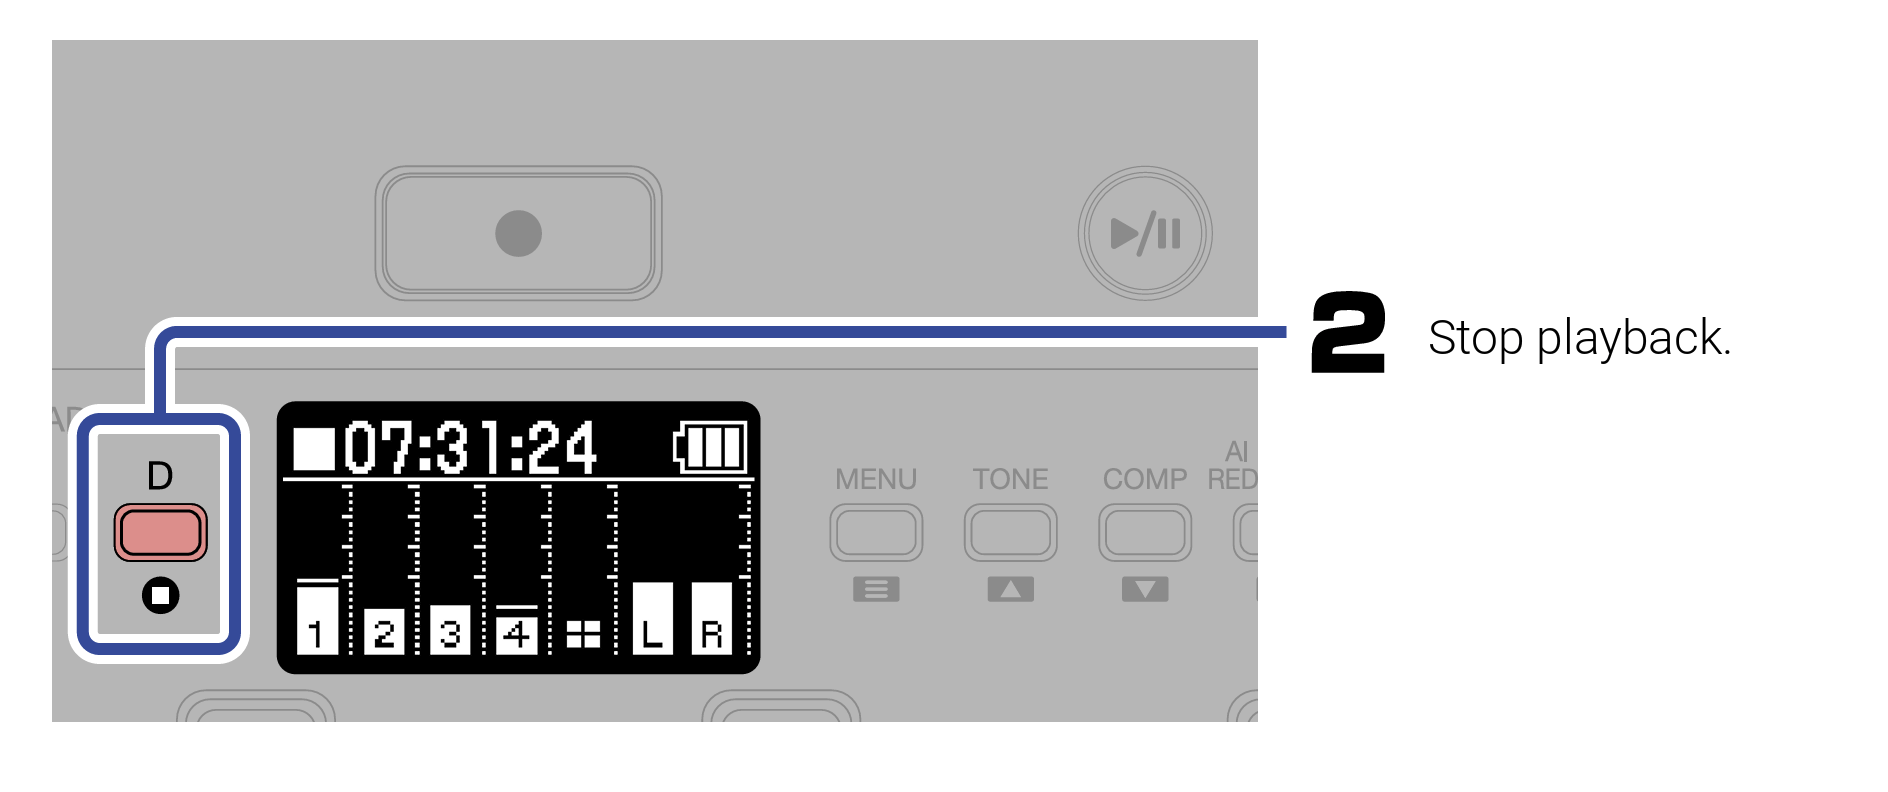
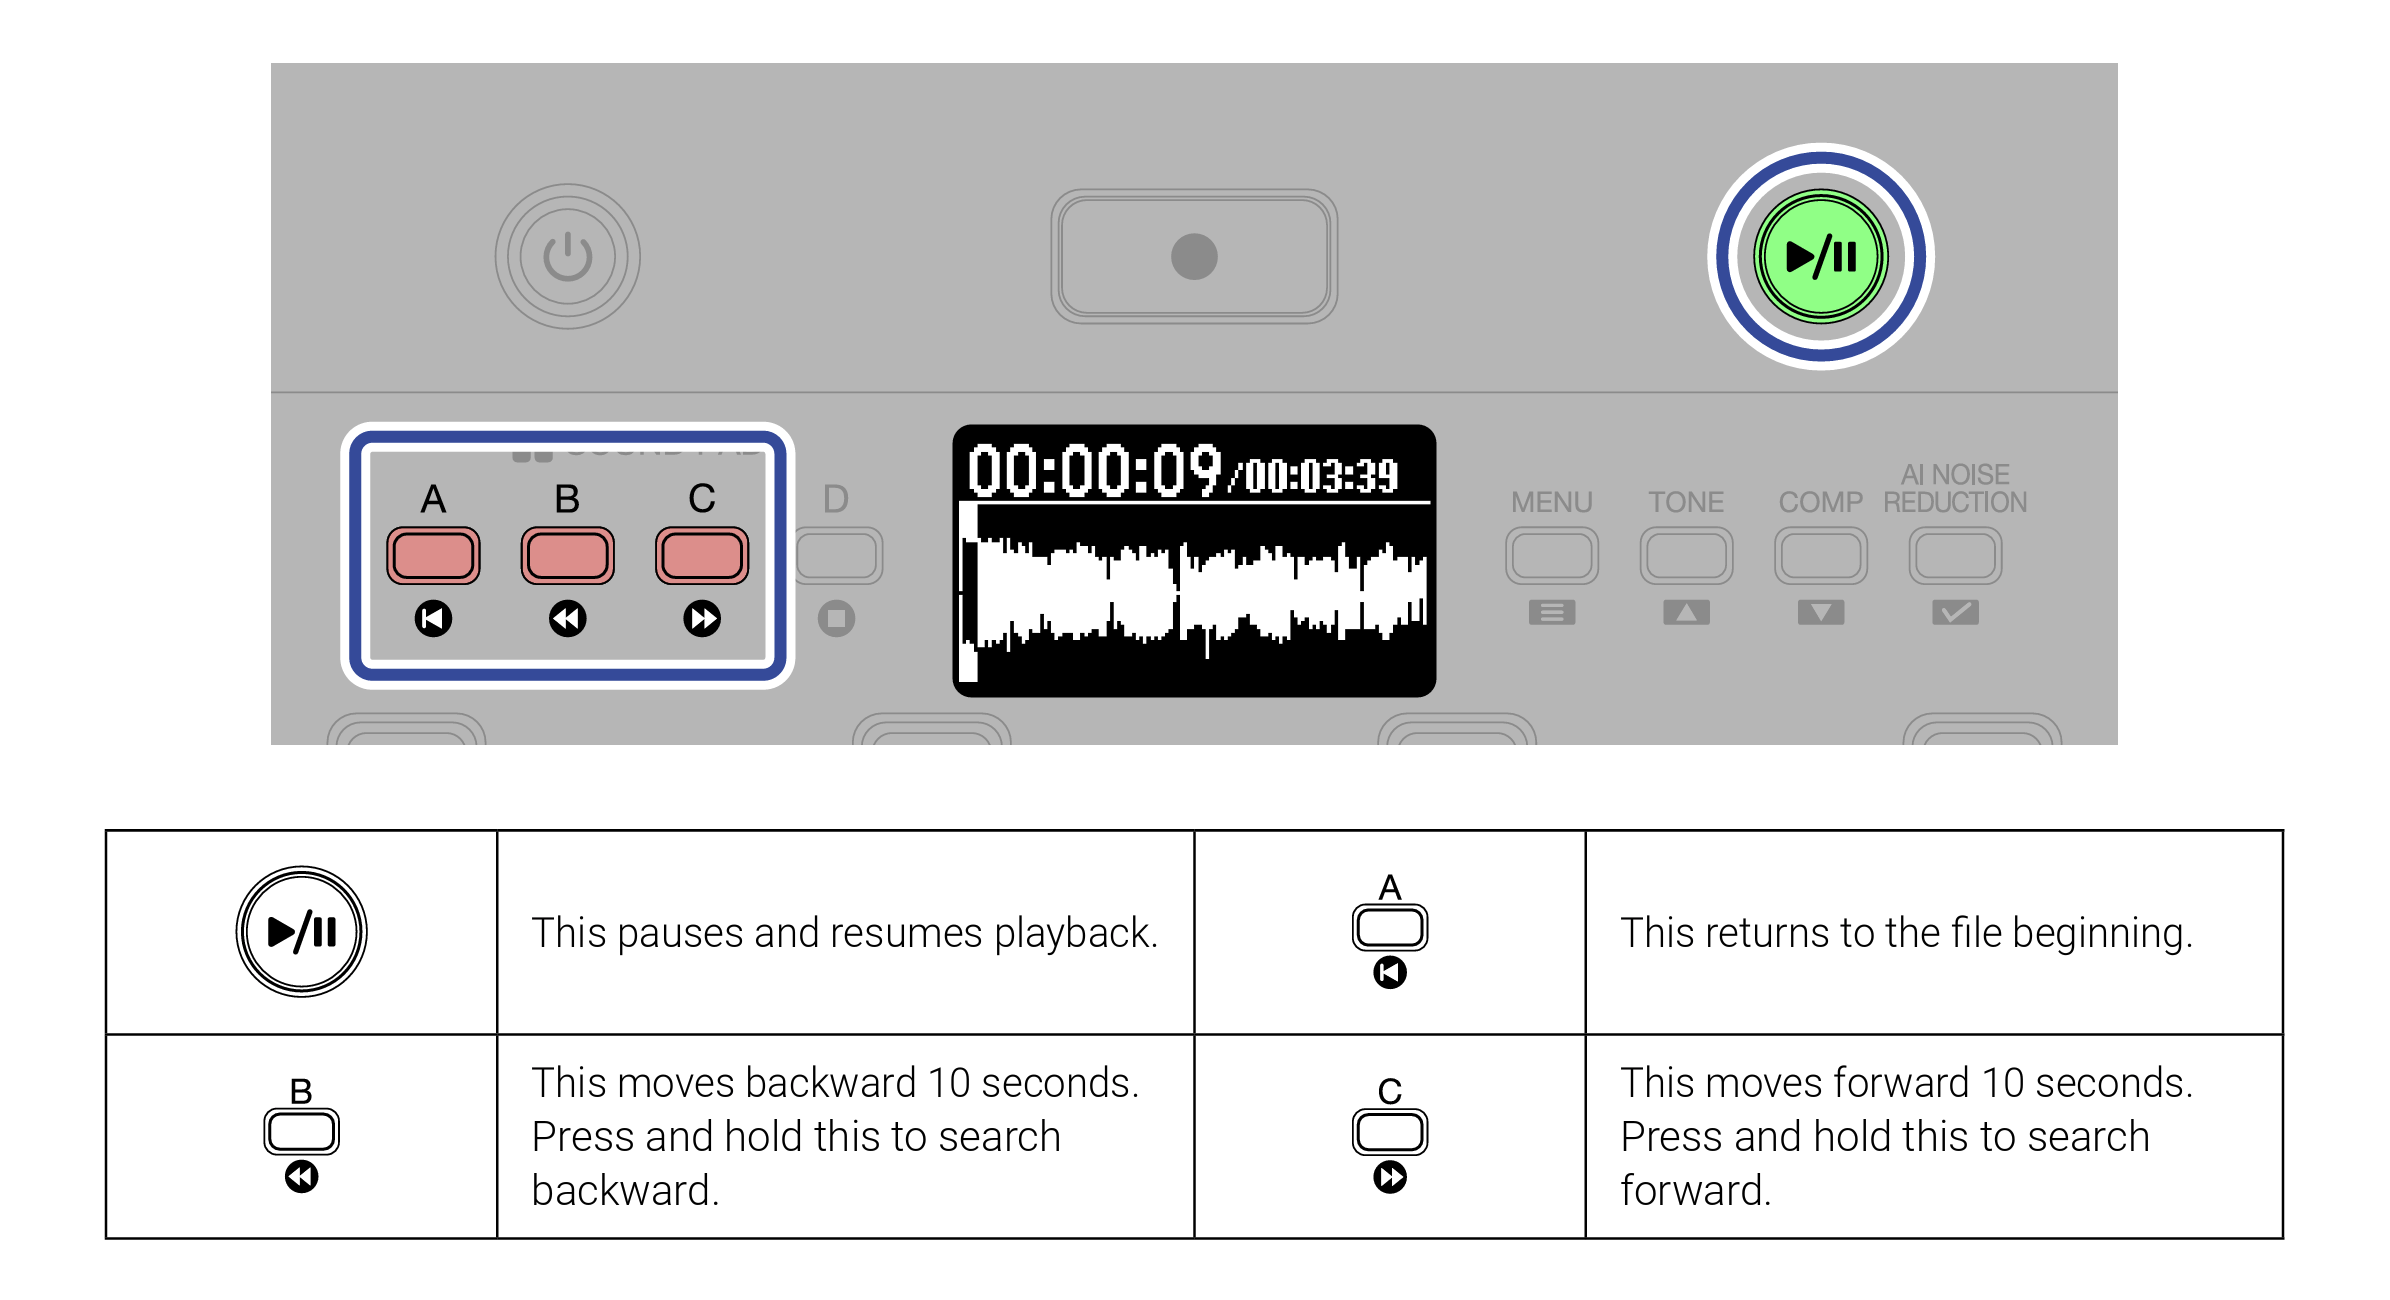
When you aren't actively recording, you can playback your files and listen to them if you like. Use the Play/Pause button to initiate playback and then use the red "sound pad" buttons to stop, skip forward or backwards, or return to the beginning of a file as indicated by the icons below them
## Transferring your files
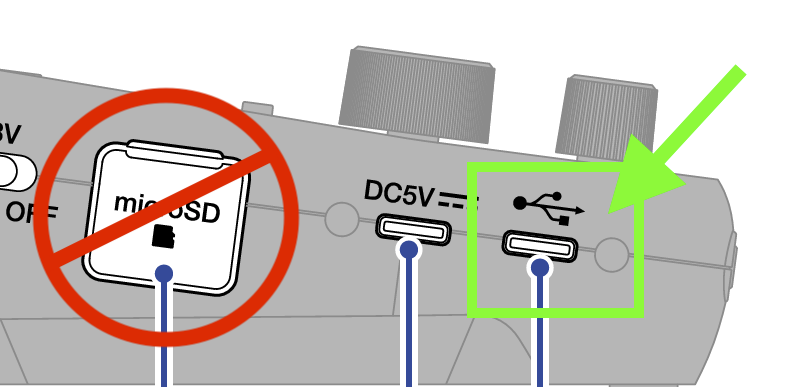
All transfers will use the provided USB cord, found in the cat box on the tray, to connect to your laptop or other device. **Do not remove the SD Card from the P4 Next for any reason.**
* [ ] Connect the USB-C cord to the remaining USB-C Port on P4 Next, located to the right of the power cord.
* [ ] Connect the other end of the cord to your laptop or other device directly or with one of the USB adapters provided.
* [ ] Press menu, and use the up, down, and confirm buttons (also the tone, comp, and AI buttons) to navigate to USB File Transfer and press confirm.
* [ ] You should see a drive pop up on your laptop screen, just like you would any USB thumb drive or external hard drive.
* [ ] You will find both the mixdown ready to go file named as "yymmdd[^1]\_random\_filename.wav", as well as folder called "P4Next\_Multitrack" which will have each individual mic's file as well.
* [ ] Drag and Drop files onto your desktop or computer folder.
* [ ] ***DELETE YOUR FILES AND EMPTY YOUR TRASH BIN.** This avoids confusion for the next user about which files to download*
* [ ] Watch this video for a brief overview:
{% embed url="" %}
[^1]: year month date